|
|
| Like most folks living in the northern latitudes, heating the home is an unavoidable expense that always seems to only get more expensive. In the past we'd considered heating with wood, but to install a wood stove or fireplace in the old house just didn't seem cost effective especially considering the increased insurance cost which like the cost of heating, only seems to go up. Then we discovered an alternative method that would let us heat not only the house, but the workshop as well, without the expense and hassle of installing a chimney or the increased insurance liability. |
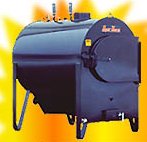
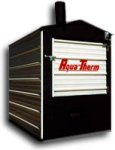
This method places the stove outside of the house - thus eliminating the need for a chimney in the house, the unusable space occupied by the stove and the mess of wood and ashes inside the home. Heat is transferred using insulated hot water lines buried underground between the boiler and the buildings to be heated. Pumps move the water/anti freeze solution continuously, insuring rapid response when heat is called for. We chose the Aqua-Therm brand for a number of reasons - not the least being the manufacturer is located about 25 miles away. |
 |
 |
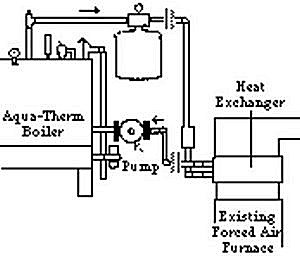
| This is a diagram of the basic external hot water boiler system. Note how it uses existing forced air ductwork much like a central air conditioner. | This diagram shows how the hot water from the boiler can be used to supplement the domestic hot water heater. |
 |
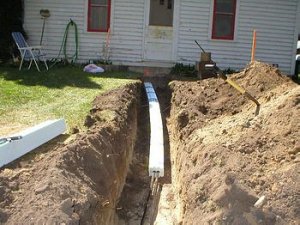 |
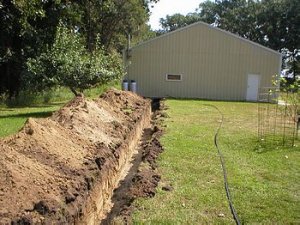
| The first step is to dig the trench between the boiler and the building(s) to be heated. In our case the two buildings are 150 feet apart, so we opted to locate the boiler midway between them. Here is a view of the 3' deep trench that we'll lay the insulated PEX pipes in. | This is what the insulated pipes look like where they enter the house. The trench is not as deep here as we opted to bring the pipes in near the ceiling of the basement. |
 |
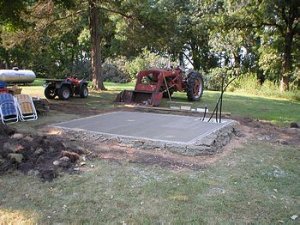 |
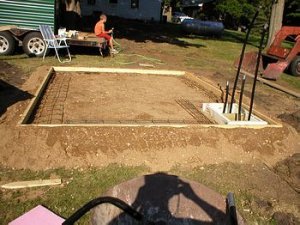
| After burying the lines we formed up the concrete slab the boiler will sit on. | The concrete pad is large enough to hold the boiler enclosure and a couple of cords of wood. |
 |
 |
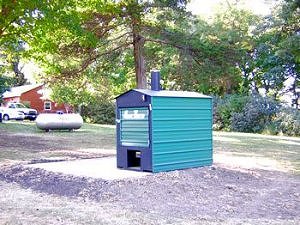
| The boiler in it's enclosure set on the cement pad. | Here's how the hot water lines plumb into the boiler. |
 |
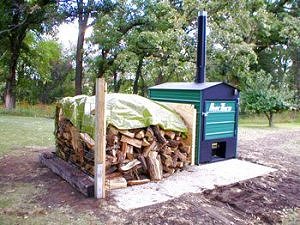 |
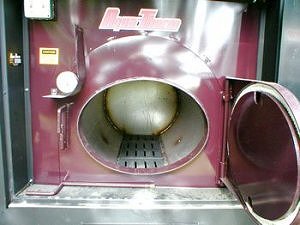
| Looking in to the boilers stainless steel firebox. | The finished project with a couple weeks worth of wood nearby. |
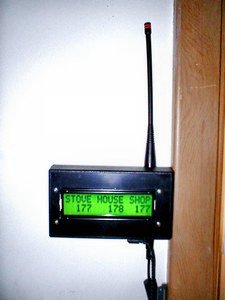 |
We use a wireless system monitor that I designed and built which keep tabs on the supply and return temperatures for both buildings. It's proven to be a valuable tool for operating the system and helps prevent small problems from becoming larger ones.
The monitor consists of two parts. The transmitter is located at the boiler. It has three temperature probes that continuously measure the hot water supply and the two return temperatures. This information is transmitted to the receiver (pictured) and then displayed on the large LCD screen. |
| One of the obstacles we had to engineer our way out of was an under sized boiler for the two buildings it heats. If the weather was cold, having both the house and shop heater fans running at the same time would drag the boiler temperature down below optimum efficiency. To prevent this, I designed a prioritized controller for the shop heater. It monitors the incoming hot water temperature and cuts off the shop fan if the temperature falls below an adjustable setpoint. It also acts as the shop heat thermostat. It has a digital LCD display that shows the current air and water temps as well as their cut in/out setpoints. Two buttons access the adjust menu and the settings are stored in non volatile memory. | 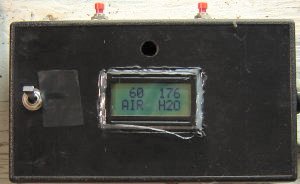 This unit replaces the original thermostat. |
This page was updated 2-9-08